Thinking of starting a business in India? One of the first legal steps you’ll face is registering under the Goods and Services Tax (GST). While GST has simplified India’s indirect tax system, the actual registration process can still feel overwhelming—especially if you’re logging into the GST portal for the first time.
This guide breaks down the GST registration process in India step by step, with tips, practical insights, and screenshots you can add later. By the end, you’ll know exactly how to register, what documents to prepare, and how to avoid common mistakes that delay approval.
👉 If you’re new to GST, check our complete guide to Goods and Services Tax (GST) before continuing.
Who Needs GST Registration?
Not every business in India needs to rush for GST registration. But if you fall under certain categories, the law makes it non-negotiable. Let’s break it down:
According to Notification No. 10/2019, any business engaged exclusively in the supply of goods must register for GST if the annual turnover exceeds ₹40 lakhs.
Turnover Thresholds (Standard Eligibility):
- Goods Suppliers → Mandatory if your annual turnover exceeds ₹40 lakh (₹20 lakh for some special category states).
- Service Providers → Mandatory if annual turnover exceeds ₹20 lakh (₹10 lakh for special category states).
Compulsory Registration (Even Without Turnover Limits):
- Interstate suppliers → Selling across state borders? GST registration is a must, regardless of revenue.
- E-commerce operators and sellers → Platforms like Amazon/Flipkart? Registration is mandatory.
- Casual taxable persons → Running a seasonal stall at an exhibition? You need GST registration.
- Reverse charge mechanism businesses → If you’re liable to pay GST under RCM.
- Non-resident taxable persons → Businesses outside India but supplying goods/services in India.
👉 Pro Tip: If you’re on the fence about whether you fall into these buckets, better to get clarity now than face penalties later. For a deep dive into how GST enforcement actually works, check our blog on how GST compliance is enforced in India.
Step 1: Prepare Your Documents
Before logging into the GST portal, keep these ready:
-
Business documents: PAN card, proof of business registration (partnership deed, incorporation certificate).
-
Identity & address proof: Aadhaar, PAN, passport photo of promoters.
-
Business address proof: Electricity bill, rent agreement, or property tax receipt.
-
Bank details: Cancelled cheque or bank statement.
Incomplete or mismatched documents are the #1 reason applications get rejected. Double-check before uploading.
Want A ready-to-use GST Registration checklist?
Step 2: Start Registration on the GST Portal
Visit www.gst.gov.in.
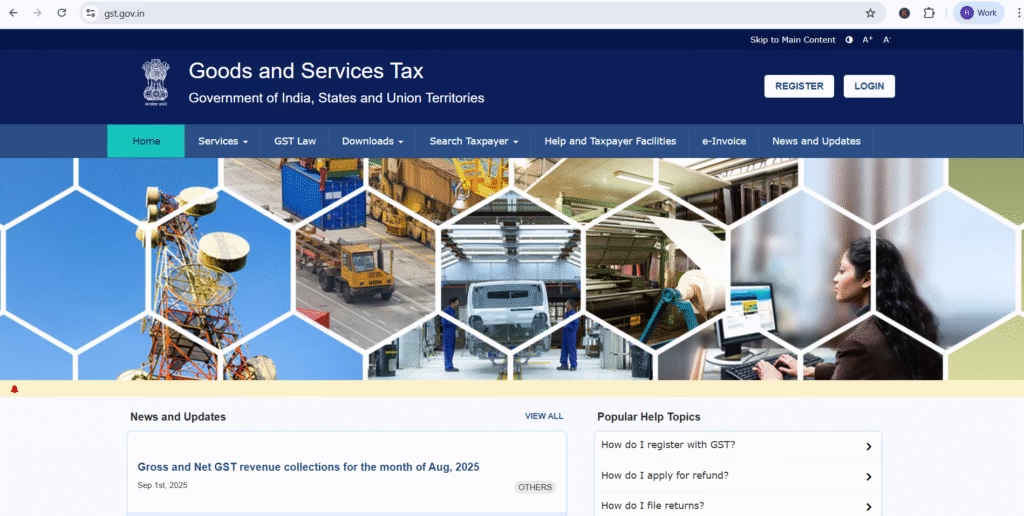
Click Services
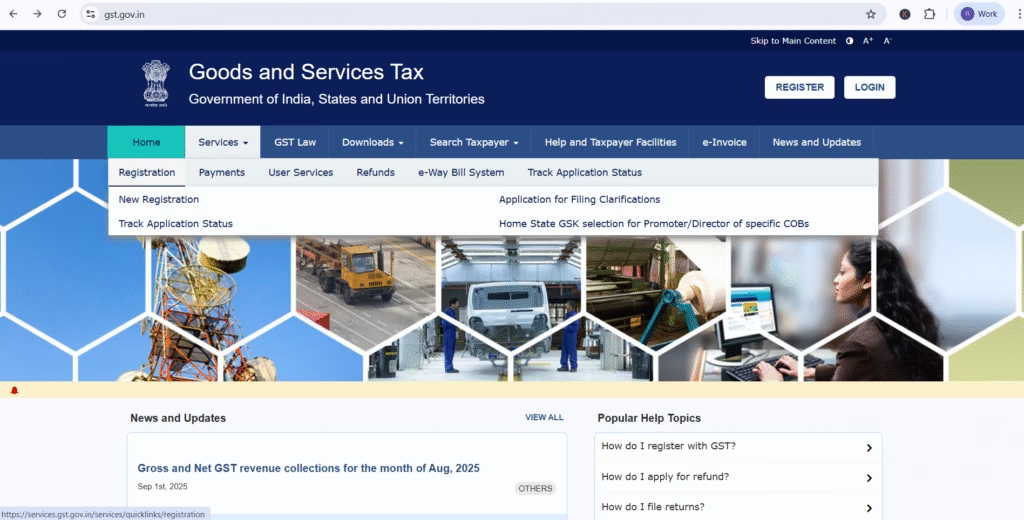
Navigate to Registration > New Registration.

Enter details like:
Legal name of business (as per PAN).
PAN number.
State and district.
Mobile number and email.
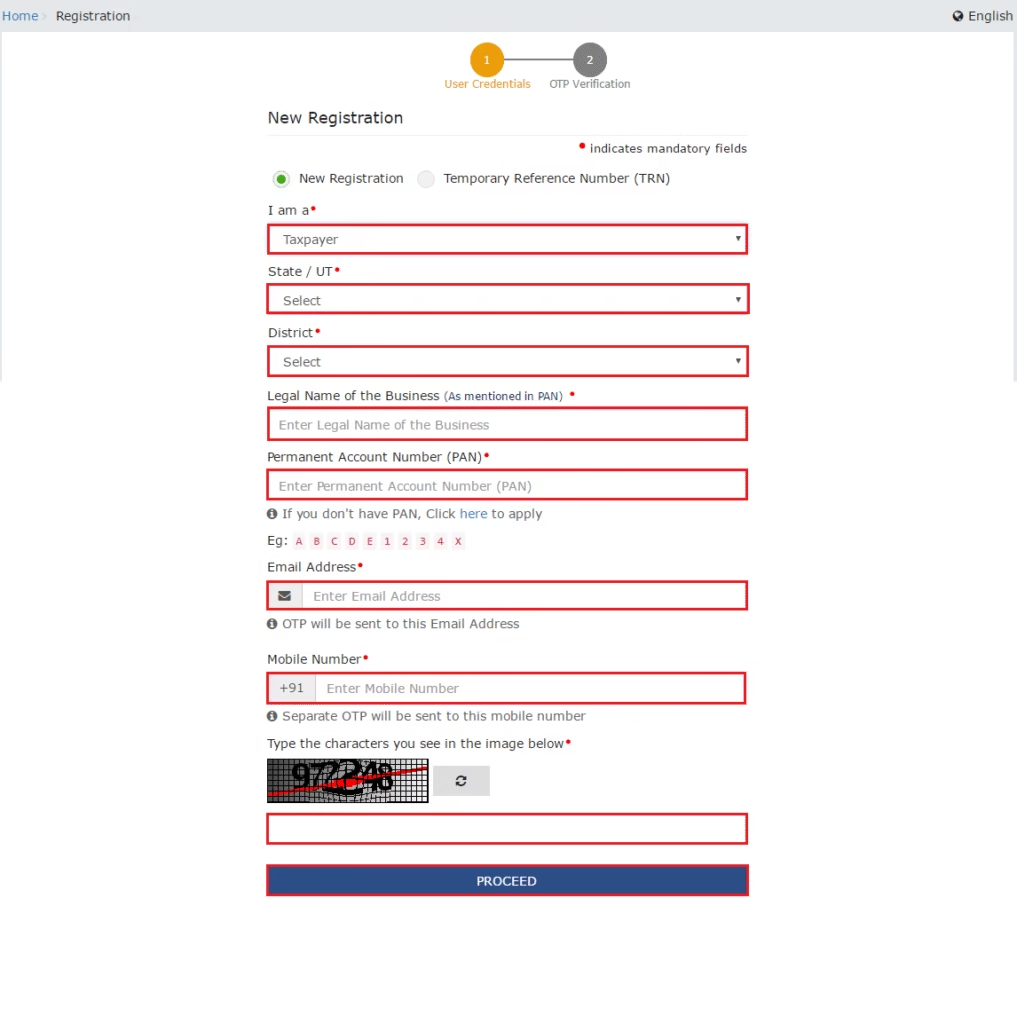
Click Proceed , You’ll receive OTP
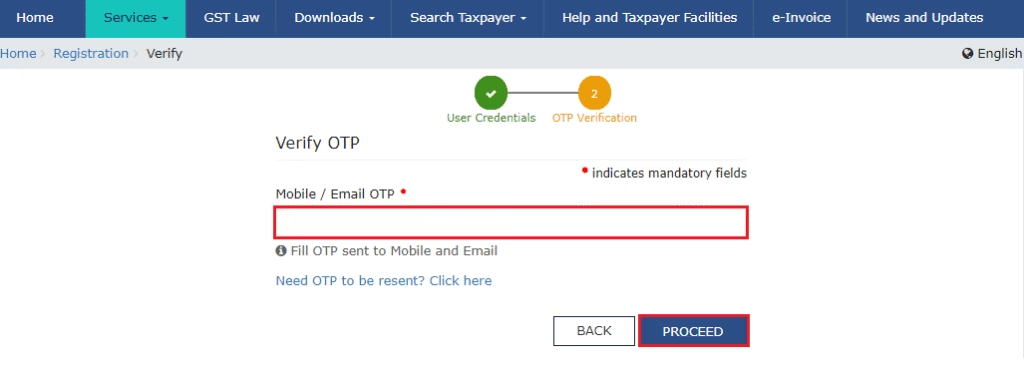
Click Proceed, You’ll now receive a Temporary Reference Number (TRN) to proceed further.
- You will receive the TRN acknowledgment information on your e-mail address as well as your mobile number.
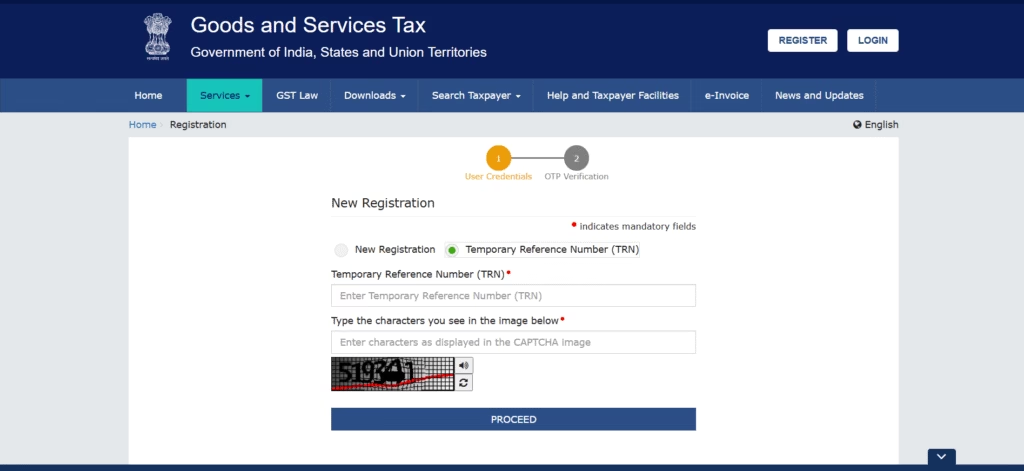
- Alternatively, you can also click Services > Registration > New Registration option and select the Temporary Reference Number (TRN) radio button to login using the TRN.
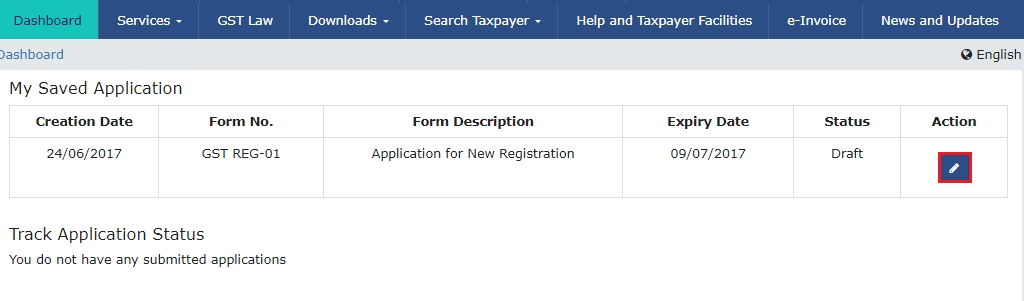
Step 3: Fill Part-B of Application
Log in with TRN:
Complete Part-B:
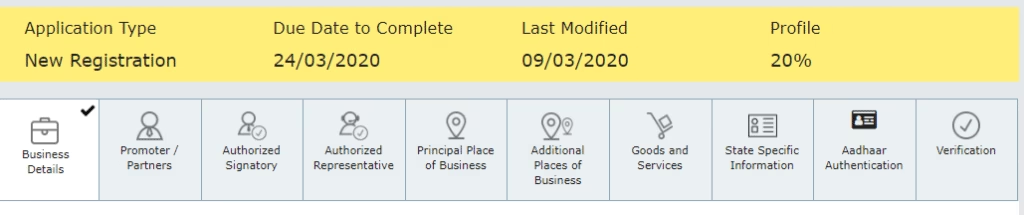
-
Business details – nature of business, state jurisdiction.
-
Promoter/Partner details – personal information and Aadhaar authentication.
-
Authorized Signatory – person who will file returns, sign documents.
-
Principal Place of Business – address, proof, and geotag.
-
Bank Account details – IFSC, account number, supporting document.
Upload required documents in the specified format.
Step 4: Verification & Digital Signature
- Applications must be authenticated via E-Sign (Aadhaar OTP) or DSC (Digital Signature Certificate).
- Once verified, the application is submitted to the GST officer for processing.
Step 5: GSTIN Approval
If all details are correct:
- You’ll receive your GSTIN (GST Identification Number) within 7 working days.
- Sometimes officers issue queries (Form GST REG-03). Respond promptly with documents to avoid rejection.
👉 After approval, download the GST Registration Certificate from the portal—it’s proof of your compliance.
Getting registered is just the first step—once your GST journey begins, keeping track of filings, mismatches, and compliance can be overwhelming. That’s where smart tools like the Pro Analyser’s GST Analysis tool come in. It simplifies GST data review, flags errors, and gives you actionable insights so you stay compliant without the stress.
Common Mistakes to Avoid in GST Registration Process
- Using personal bank details instead of business bank accounts.
- Incorrect or blurred document uploads.
- Not matching business name with PAN records.
- Delayed response to officer queries.
Final Thoughts
Registering for GST is not as complicated as it looks—but missing a small step can cost you time and compliance headaches. With the right documents and careful portal navigation, you can complete it smoothly in one go.
If you’re planning to scale your business, GST registration isn’t just a legal formality—it’s your ticket to seamless interstate trade, credibility, and input tax benefits.
GST registration opens the door to compliance, but managing it correctly is what protects your business. If you want a faster, error-free way to review and analyse GST data, try our GST Analysis tool —built to save time and keep you compliant.
Next Step for You:
- Once you’ve registered, explore our blog on GST Return Filing to understand your ongoing compliance responsibilities.
- For more details on GST Registration Process, check out the official GST Registration Tutorial Guide.